Blog
Utilizing Solar powered energy While Outdoor camping
10/15/2013 15:21Camping out along with solar powered energy equipment has several positive aspects besides becoming eco-friendly. Transportable solar power components use a longer life cycle of battery and so are much more lightweight much less bulky compared to conventional camping out components.
Establish the actual accessories you need. In case you are hiking at a campground, you might be needs will change as compared to if you aren't.
Consider the weight and size in the equipment. If you're not staying in a campground, you will end up transporting the actual add-ons, and that means you will not want hefty items.
Put money into solar powered flashlights, AM/FM radio along with lamps. These types of equipment provide safe and sound choices to battery operated accessories. Simply because they make use of solar technology, you won't have to worry about purchasing brand-new battery packs.
Make use of a photo voltaic 12v charger when you cost little electronic products. To get in touch units, being a notebook, for the charger, you must have a new 12-volt smoke light adaptor made designed for internet connected computers. The actual charger restores the battery or slows the emptying battery, should you be making use of it.
Include a solar control on the solar panel if you refresh power packs. Hook up the device involving the controller and battery power. You may steer clear of overcharging and also damaging battery. Gadgets with a 12-volt battery pack stays fully charged when connected to the controller.
Make use of a book bag. Many organisations promote rucksacks with all your solar powered energy needs, with a 20-watt Sun solar panel and also battery operator. Connect your light box's cord for the backpack's electric outlet interface to be able to cost. https://www.jollyoutdoor.com/camping-backpacks/
Learning to make Emergency Candle lights
10/15/2013 15:18An emergency candlepower unit may aid you when you really need a new heat source. Urgent situation candles will give you mild as well as heat, and will permit you to prepare food foods within a tough circumstance. When you make unexpected emergency candle lights, you should keep them throughout perfect locations, such as your purse, car and also camping backpack, to successfully also have one particular prepared for just about any situation. https://www.jollyoutdoor.com/camping/
Cut the superior away a matchbook. Minimize the particular strikers off the package, and after that tape the matchbook inside the sport bike helmet of the container may. Stick the actual strikers next to the matches for the top which has a hot glue firearm.
Place the outdated candles in a increase central heating boiler, or dissolve enough paraffin become for you to fill up the jar can easily. In the event you melt excessive wax, it's possible to keep it later on as soon as that solidifies. Watch the actual polish because it melts, as well as wake the idea to inspire the particular shedding.
Lower corrugated cardboard straight into strips. The actual strip only have to become because high since the may. Roll the actual strip in a restricted coil nailers.
Group wood poker chips in to the container may. Decrease the solid wood casino chips firmly across the candlewicks. Complete the holes and cover the particular card board for you to fill up the metal could totally with the melted become.
Pour your candlestick polish to pay for the cardboard boxes and also solid wood potato chips. Put the candlewick horizontally over the candle become. The candlewick has to be as long as the particular tin. Lighting the candlewick in an emergency, as well as the flare may propagate across the the top tin can.
How to Use Alcohol Stove Outdoors and Some Notices to Take
10/15/2013 15:16Many travelers, including myself, like cooking when in outdoors .They have, more or less, some problems in using the alcohol stove. Some new travelers have some misgivings or do not know to use when they use the alcohol stoves for the first time. Now I’m writing some of my experiences in using alcohol stoves.

When using the alcohol stove for the first time, we can add alcohol to the stove for more times, about three times, which is OK. Each time, when we add alcohol, 80% full is enough in order to let the alcohol swab to fully absorb the alcohol to have the alcohol more fully burnt. The longer the alcohol stove has been kept, the better it will be.
The alcohol stove should be preheat about 5minutes. When the flame is stable, we can put in what we want to cook. As for the alcohol, we should choose the liquid alcohol with the density of 95% or higher. We can buy this kind of alcohol in the vegetable markets or hardware stores. Alcohol with this density can be burnt more fully and will not leave a lot of water after being burnt. Usually, the alcohol sold in the drug store will leave much water after being burnt and its thermal power is weaker.
If we want to add alcohol into the stove during cooking,make sure to put out the fire, and the cool the stove for a while,about 5 minutes.
As a rule, to boil a liter water needs about 15 minutes,which is timed from my own stove. My stove is a ALOCS , which is an alcohol gasifier. I have never use other brands, such as Brother and Fire Maple, so I do not know about their details. We can add proper alcohol to the stove according to what we will cook.
After you finish using the alcohol stove,make sure the alcohol stove has all been built and put out the fire with a cover. Put it into the backpack after it has cooled down.
OutdoorWikis exclusive original. Please indicate the original source if reprint.
Article Source:https://www.outdoorwikis.com/how-to-use-alcohol-stove-outdoors-and-some-notices-to-take/
Outdoor Safety:the Establishment of Anchorage System
10/15/2013 15:154 principles shall be followed when we establish the anchorage system, that is the SRENE Principle:
S: Secure Each anchor should be secure.
R: Repeat There should be redunctant anchor points. A system should have at least 2 anchor points. If the anchor point is weak, there should be properly more anchor points.
E: Even Each anchor point should carry even stress.
NE: Not Extend The damage of any anchor point should not dramatically extend the anchorage systm, which will lead to fall.
Take Yidu Palisades as a particular case, I think that we should pay attention to the following aspacts.
1. The steel ladders have long been out of repair and some have been broken up by the rust. We should strike the section we intend to use to make sure that the steel pipes have not been rusted.
In the picture, there are two major ropes 50 meters in length. There can be a anchor point at the back row rail fence and the other one at the front row fence, but both anchor points should carry even stress. Do not have the front anchor point carry all the stress and the back one work as an alternate.

3. The rope used at the anchor point had better be bandlet, and prusik are used to fasten the rope around the steel pipe, and at the other end, lock is used, as is shown in the picture below. (The bandlet shown in the picture is a double length bandlet, which is too long. If it is self-made, the length can be more suitable. )

4. After the two anchor points have been set, use a bandlet or rope(which can carry 10KN) to make a Y system, as is shown in the picture below. Make sure the two anchor points carry even stress.

5. Finally, fasten the main rope to the main node of the anchorage system.
6. Another 60-meter main rope should be at the piton on an adjacent but not the same rock, thus, there will be two very secure anchor points. Let the main rope get through the lock on the upper rail of the front fence in the same way as the above mentioned third point. But the role is not an achor point, but changing the forced direction of the main rope to reduce the friction of the main rope with the rock.
7. When we are practising going up and down, we’d better have someone monitor the state of the anchor points and pay attention to the friction of the main rope with the rock. If anything strange happen, he can raise the alarm.
OutdoorWikis exclusive original. Please indicate the original source if reprint.
Article Source:https://www.outdoorwikis.com/outdoor-safety-the-establishment-of-anchorage-system/
How to Deal with the Injury Bleeding During Outdoor Activities
10/15/2013 15:15Skin bruise Skin bruise is the most commonly seen injury. But even though the extent of the injury is comparatively large, it is just superficial injuries and only capillary bleeding.Usually, it will not lead to massive blood loss . The major injury management is to prevent infection. Under outdoor conditions, you can clean up the injuries by the gauze after wetting with the hot water in the water jug, and then use a clean towel or other soft cloth to cover the injuries. Then use clean cloth, bandage or cotton textile to dress .
Scalp bleeding Scalp bleeding is comparatively serious. Because the scalp is rich in vessels, it will bleed more massively. Under outdoor conditions, compression hemostasis is often adopted, while there is some difficulty in dressing the head.
Serious injuries Injuries which are more serious, bleed more massively, or lead to dehiscence that needs sewing up, tend to need compression and presure dressing hemostasis. Before dressing, you can use the clean gauze to clean up the injuries after wetting with the hot water in the water jug. Never should you scatter dirt or flour to the injuries. They not only will further pollute the injuries but also will bring trouble to clean up the dehiscence in the next step.
Bleeding or liquid flow in mouth, nose or ears Head injuries led by falling may cause bleeding or liquid flow in mouth , nose or ears. It may be the result of fracture of skull base. The right practice is not packing hemostasis, but letting them bleed or flow out thoroughly by changing the body position. (Notice: The fracture of skull base is very severe craniocerebral trauma. On the site, you should also consider whether it is fracture of cervical vertebrae. If it is fractuure of cervical vertebrae, body position change will cause paraplegia.)
How and when to use the tourniquet
The tourniquet should not contact with the skin directly, and you should use cotton texitle as underlay.
The degree of tightness of the tourniquet should be proper. If the far end of the hemostasis does not bleed massively, the looser, the better.
Loosen the tourniquet regularly, once every fourty to fifty minutes. When it is loosed, you should stop it bleeding by pressure with your fingers for about 2 minutes and then tighten the tourniquet again.
Record the time when the tourniquet is used, and then tell the the replacement. The time for using the tourniquet should not be more than two to three hours.
OutdoorWikis exclusive original. Please indicate the original source if reprint.
Article Source:https://www.outdoorwikis.com/how-to-deal-with-the-injury-bleeding-during-outdoor-activities/
How to Choose a Camping Backpack
10/15/2013 15:141. Choose the right capacity based on the length of trips you are likely to take and the volume you need to be able to bring the things you will need
If you plan to take shorter trips lasting one to three nights, and not to camp in the open air with little belongings, you can get by with a smaller camping backpack about 25-35liters than if you were to take a longer trip. This type almost has no frames, as it is generally simple-structured with a main pocket and 3-5 smaller pockets to distribute cargo loads properly. If longer trips of 3 or more days are in your future, a pack classified as an extended trip pack will be necessary to accommodate all of your gear, as they generally hold 50-70 liters of content. But if you have many more and bulkier camping items, you will need to look for 80+20L camping backpacks with greater storage capacity.
2. Choose a Pack based on your ways of exercising and types of camping backpacks
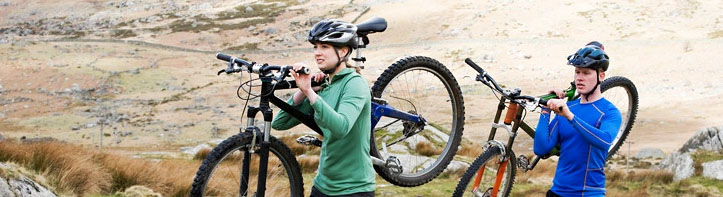
Different exercising activities demands for different versions of camping backpacks. For example, the backpacks specifically designed for rock climbing are generally having no hard supports to improve its flexibility; they are equipped with hard points to carry climbing tools. Some version even has placemats to wipe them. However, the backpacks designed for bicycles focus more on riding characteristics. The four categories applying to riding are knapsack, saddlebag, flap handbag and pack for both shouldering and hanging.
3. Choose the size of suspension system according to your torso
The suspension system of backpacks has their own specific range of application. Some backpacks offer interchangeable hip belts that usually accommodate a wide range of hip sizes, but it is not unlimited. So it is very important to choose the right size. Generally speaking, most of the weight you will be carrying around will be pushing down on your hips. Making the supporting points of shoulder straps should be slightly lower than the level of your shoulders as it will help to provide support and distribute the weight load more evenly on your back causing less strain and problems. Buying a correctly sized hiking backpack is essential for ensuring comfort and safety out on the trail.
4. The Quality of the Materials
When choosing a backpack, many people tend to pay more attention to its colour and shape. In fact, whether the backpack is sturdy and durable mainly lies in its materials. As for the braids, the prices of the ordinary and the qualty braids are different about three to five times. The braids of BIGPACK can bear over 200 kilograms.
The shell fabrics are also very different. The same 420D shell fabrics are different in weight. The ordinary shell fabrics are 280 grams per yard and those of high density is 410 grams per yard. Therefore, these two kinds of shell fabrics are quite different in intensibility and abradability. Testing destructively on the friction machine for the same 500 D shell fabrics, the ordinary nylon cloth is damaged when the machine rotates 1075 round and its abradability is three times that of the ordinary nylon.
As for the coating, the low-grade backpack always use PVC coating, which will harden when it gets cold. While some top-grade backpack tend to use shell fabrics with PU coating, it doesn’t change markedly after getting cold. The water resistence can reach over 1500 MM if the shell fabric coated with PU four times.
5. Good Structure and Design is the Gurantee of the Superior Performance of the Backpack
Whether the backpack has good performance mainly lies in the overall beauty that its scientific design of the structure endows.More importantly, it can let you enjoy its brilliant performance.
Its suspension system sturcture adopts the theory of Nepal back baskets and uses the doble V shape design. The lining frame is a V shape, that is the upper is wide and the lower is narrow, the upper is thick and the lower is thin. It will be a backbasket shape after loading things. This kind of structure can better deliver the stress.
Changing the position of the structure liner can change the backpack’s position up and down. The TOP series backpacks also design a device to enlarge its volume. The upward volume-enlarging backpacks have a zeaper below, and by opening the zeaper, the backpack can bear about 10 kilogrammes more weight. The sidewards volume-enlarging backpack has two zeapers in the main pack, by opening the zeapers , the backpack will become larger so as to enlarge its volume, which is particularly suitable to load larger items. The users can adjust its height and width according to their need. This kind of backpack can bring you a lot convenience.
OutdoorWikis exclusive original. Please indicate the original source if reprint.
Article Source:https://www.outdoorwikis.com/how-to-choose-a-camping-backpack/
High Sierra Access Daypack
10/15/2013 15:12If you’re like me and like to travel for a weekend, but want to take most of the comforts of home with you, the High Sierra Access Daypack is the choice. It’s also the perfect choice for travelers, high school and college students, and globe-trotting adventurers.
It’s large enough to carry a number of books and electronics devices, yet small enough to be used as carry-on luggage for a weekend trip. This is one product that has a number of competitors on the market, but after doing my due diligence, I found the High Sierra Access Daypack superior for a number of reasons.
What You Should Look for When Buying a Backpack
I quickly discovered what really matters when looking to purchase a daypack, and some of the main features to look at are:
the weight
the dimensions
how easy is it to carry
how many compartments does it have
available colors
any warranties
extra features
Weight of the High Sierra Access Daypack
Since this daypack is designed to carry lots of stuff, you’d like to start out with as little weight as possible to save the wear and tear on your back, and this daypack fills the bill as it weighs only 1.18 pounds when empty. But do not mistake lightweight for cheap or flimsy as it is made from 1000-denier Dura lite and mini-ring stop and diamond ring stop.
The Dimensions
The High Sierra Access Daypack has plenty of room for everything you need for business and pleasure on the road. It has dimensions of 15 inches X 20 inches X 9.5 inches, and has an organizer with a mesh pocket, and pockets for your MP3 player, pens, and a padded sleeve made to house a 17-inch laptop. It has a total capacity of 2,743 cubic inches and a unique built-in suspension system and an adjustable sternum strap help to distribute the weight of the contents evenly across your body. It also features a padded back panel with a tuck-away waist belt and large mesh side pockets for extra storage space.
How Easy Is It To Carry?
The High Sierra Access Daypack features S-shaped shoulder straps and Vapel mesh Airflow padding, so it won’t weigh you down and it breathes for cooler summer excursions. It also has adjustable side compression straps and a tuck-away rain cover to keep your belongings and electronic devices safe at all times.
A sternum strap provides for extra stabilization and it has a handy top grab handle so you have a choice whether you’re moving quickly through the airport or through the halls of an institute of higher learning. Many people have found that this daypack is ideal as a carry-on luggage piece for flights, and many report that it has capacity for clothes and accessory needs for up to 4 to 5 days.
What Colors Is It Available In?
This versatile daypack is available in your choice of black or Pacific blue, so either one is sure to please both men and women.
Does This Daypack Have a Warranty?
The High Sierra Access Daypack comes with a lifetime warranty and a 100% money back guarantee so you know you’re getting quality that’s made to last.
Extra Features with the High Sierra Access Daypack
This High Sierra Access Daypack comes with key fob. The key fob is a small hardware security device that has built-in authentication mechanisms to keep your valuables away from prying eyes and probing hands. This durable daypack also has a daisy-chain, so it easily attaches to other pieces of luggage when you’re traveling.
What are Buyers of the High Sierra Access Daypack Saying?
From 337 reviews on Amazon, this product has been given a rating of 4.4 out of 5 stars.
Here is what some of the customers have to say:
“this daypack is spacious and made of durable material”
“it has more than enough room for all of the books a high school student needs to carry”
“it has tons of pockets, is well-organized, and holds a lot of stuff including my 15.6″laptop (with room to spare)”
“very decent buy compared to others in the same price range”
“great for a 4-5 day trip when you don’t want to check baggage”
extra laptop padding protects your valuables even if it is dropped”
“the rain cover keeps everything dry even in a torrential downpour”
“the perfect size to carry all sorts of things including clothes and electronics”
“the ideal daypack for carrying bulky items”
Are There Any Complaints With This Daypack?
While a small handful of customers did complain about compression strap system making it hard to quickly unzip the daypack or permit easy access to the contents. But most customers are extremely happy with the compression strap system which makes it easier to carry.
How Much Does It Cost?
Taking into account seasonal sales and other discounts, you should not pay more than around $50 for the High Sierra Access Daypack. You van get it at at Amazon.com for $45.87.
High Sierra Loop Backpack
10/15/2013 15:09I never really cared about the backpack I used when I would go to the gym after work until I began researching for a friend of mine. She was looking for a great multi-purpose one that would be great for things such as camping, going to the gym, and more.
I found the High Sierra Loop Backpack to be a great choice and the best part was it is offered at a price anyone can afford nowadays. Here is my review of this great backpack that is great for a number of uses regardless of what it is.
What You Should Look For
When I was looking into a number of styles of backpacks I found that the High Sierra Loop Backpack was even a great choice for students who are in college or even high school students. I found there are a few things that you should ensure you have in a backpack including:
Comfort
Durable design
Compartments
High quality
Durable straps
Some backpacks are poorly designed and therefore the straps might break or the backpack itself begins to tear. That’s why having a backpack that’s made from high quality material is always a better option and therefore meaning you might need to invest a little more money.
Straps
One thing I discovered was that a number of people were extremely satisfied with the design of the straps. The shoulder straps were comfortable even when the bag was loaded up. Most other bags begin to dig into your shoulders making them very uncomfortable to carry. There is also an elastic pocket which allows you to keep your cell phone within reach at all times.
The bottom straps of the High Sierra Loop backpack allow you to attach on any other equipment you might need during your day and there are side straps as well which work great for keeping your belongings safe and secured at all times.
Compartments
The High Sierra Loop backpack offers ample space and compartments to fit all of your belongings in it with ease. There is a see through netting as well in the side pockets which is great for keeping a water bottle, tripods or even a set of poles used for hiking. I personally like using it for a camera tripod and one for my water bottle while I’m out hiking so I can capture the scenery around me.
There are an additional 3 compartments that zip up and are great for other small items such as keys or anything else that might fit. The biggest compartment which is found on the front of the back pack is great for calculators, keys, your stationary and more.
There is a lot of room offered or you could even fit a few paperback books for longer camping trips. There is also a compartment ideal for threading your MP3 player or your iPod’s headphones while your player is safe and secured in a nearby compartment.
Size
The High Sierra Loop backpack is great in size and I found the dimensions were 19.5″ x 14.5″ x 8.250″. While this bag is a tad bigger than some of the other backpacks on the market, it’s also used for different things than what other backpack’s are used for. I found the size to be ideal for my needs but it’s not big to the point you’re going to be running into things with it on your back.
Quality
I really like the quality of the High Sierra Loop backpack. The stitching that is used as well as the material used to make this backpack I found to be high quality unlike some backpacks. The inner portion of the backpack is made from nylon which makes it water resistant which is great.
What You Can Expect to Spend?
The original price of the High Sierra Loop backpack is around $75 but there are at least 6 sites that I checked out that are offering this backpack for $30 if not less. This makes it one of the more affordable bags and for the quality of the bag I found it to be superb. The price definitely suits the quality as the bag. You can get it at Amazon.com for $27.88.
What Do Others Think?
There are several satisfied customers that already have the bag and from Amazon to at least 3 other sites, there were nothing but raves about the High Sierra Loop backpack. From 638 reviews on Amazon, this product has been given a rating of 4.4 out of 5 stars.
Customers are raving about the space as well as the design and the best part is there are numerous colors and patterns to choose from which make it even more of a better choice. To date, some comments include:
“Amazing all-purpose backpack for any occasion!”
“I had to buy a few in different colors for my teens!”
“I’m a small person and found this bag to be perfect!”
“As a high school student, I love that it holds all of my books and stationary needed to get me through my day!”
“I use mine as a diaper bag and find it far more durable and higher quality!”
Are There Customer Complaints?
There are a few customer complaints about the High Sierra Loop Backpack and while some love the size of the bag others say it’s just too big for their needs. However, each person is different and there are different bags targeted towards different customers. Some people feel that the pictures featured on Amazon are not accurate and some find the mesh netting to not be big enough for their cell phones.
How to Be ready for Coachella
09/17/2013 17:00Your Coachella Area Songs and Arts Event takes place inside the wasteland capital of scotland- Indio, Los angeles each 04. Coachella features many stages using rock, boogie as well as hip-hop works. Songs enthusiasts camp in RVs or tents throughout the three-day festival, as well as lodge at nearby lodges. Temperatures can easily hit 3 digits during Coachella, thus live show participants need to be well prepared. Keep reading to understand the way to be prepared for Coachella.
Provide any package in order to replenish with features or perhaps in rest room sinks. You can wait in long lines to purchase h2o with the concession stands or why not be ready to get free drinking water yourself. Purchase a liquids bunch coming from a hiking offer retailer and also suit it into a back pack, and it'll save time and expense.
Write as well as kind a new music group routine before you leave. Several common bands enjoy concurrently, therefore create choices prior to in the car or Mobile home. Check works listed to the Mojave Outdoor tents, Gobi Outdoor tents, Coachella Phase and also the smaller sized Haven Dome. Plan an opportunity path if you are considering glimpsing few different groups enjoying from different levels at the same time.
Check out the Coachella site along with message boards pertaining to improvements. Last-minute alterations happen every year, so be ready for bands eliminating or changing stages with the last-minute. If you have any questions as to what it is possible to deliver to the campgrounds or phase location, publish these people here.
Finish off camping equipment at the outset of the week and head to Coachella earlier. Issues purchased an outdoor camping location, arrive if it unwraps Thurs nighttime to make certain a great place.
Costume lower, but deliver tiers regarding cool night time weather. Put on sun block lotion along with a sleeveless best during the day whenever Coachella can be intolerably scorching. Even so, the particular temp drops Something like 20 degrees or more during the night, consequently bring a new hat. Make sure you maintain it in a backpack so that you will not shed it or perhaps drop the idea in the group. https://www.jollyoutdoor.com/camping/
The best way to Tote Firelighter Stays
09/17/2013 16:59Not being able to get yourself a fire began applies a significant damper about outdoor activities, thus people, walkers and boating fanatics often carry firelighter twigs to make sure that they're going to shortly have a very roaring fire. In case there is rain or even water-related mishaps, firelighter stays might unintentionally get wet, causing them to be fully ineffective for meant purpose. Move forward prep is the better safeguard in opposition to acquiring trapped far away via the world without having a hearth in order to smoke and warmth. Prior to heading away and off to the forest and also streams, pack your current fire-starting supplies effectively to prevent water damage.
Lay down 6 to 8 firelighter twigs flat towards the end of your gallon-size plastic-type material freezer cooler bag with interlocking-seal whitening strips at the very top.
Force the interlocking strip together throughout 50 % the top of the handbag. Click the edges with the freezer cooler handbag to reduce air from inside, after that media the interlock whitening strips near over the remainder of your bag best.
Roll the particular carrier in the bottom level the location where the firelighter sticks in the direction of the very best to form a cyndrical tube.
Position the rolled-up, closed fridge tote in a water-proof handbag, occasionally referred to as a dry out handbag, which is often bought in a sporting items merchant. You may even place your photographic camera, cell phone, camping enables along with other things you wish to safeguard in to the dried up bag, with regards to the bag's size.
Close up the water-resistant handbag and also pack it safely in your outdoor baggage or book bag. https://www.jollyoutdoor.com/camping-backpacks/